
How to Create a Dynamics 365 Lifecycle Services (LCS) Project

Lifecycle Services (LCS) is a Microsoft cloud-based platform designed to help you manage the application lifecycle of your Dynamics 365 solutions efficiently. In this guide, we’ll walk you through the process of create a new Lifecycle Services (LCS) project in Dynamics 365, ensuring you have all the necessary steps and tips to succeed.
What is a Lifecycle Services (LCS) Project?
A Lifecycle Services (LCS) project is a crucial element in Dynamics 365, offering a centralized space for managing and deploying applications. It helps streamline operations like configuration, deployment, and monitoring of your Dynamics 365 solutions, ensuring a structured approach throughout the lifecycle.
Access Lifecycle Services : Step 1
- Open the Lifecycle Services Portal.
- Sign in with your Microsoft account credentials.
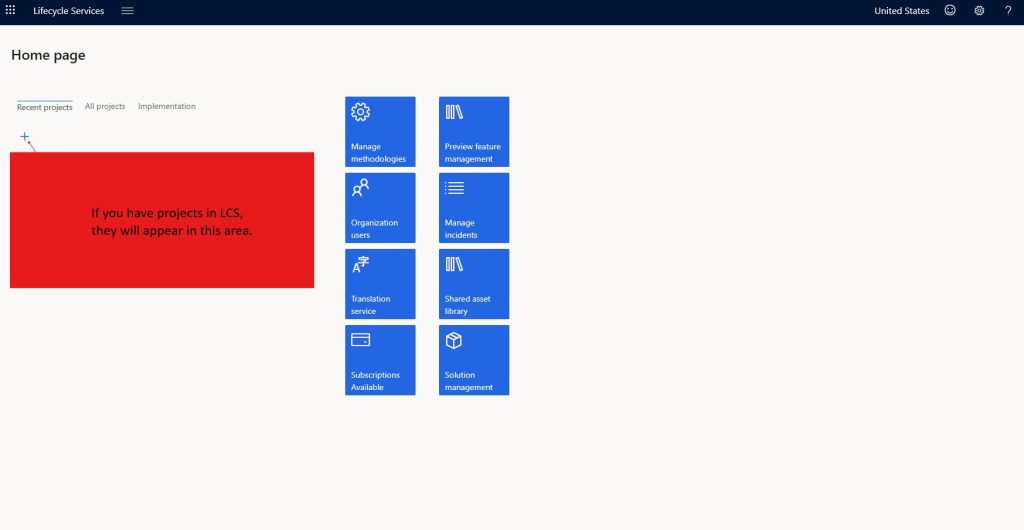
- Navigate to the Home Page. Here, you can view your recent and all projects.
Create a New Project : Step 2
1.On the Home Page, click on the “+” (Add) button to create a new project.

2.In the Create a Project pane:
- Name: Enter the name of your project. For example, “Test Project.”
- Description: Provide a brief description (optional) about the project.
- Product Version: Select the version of Dynamics 365 your project will be based on. For example, Finance and Operations.
- Industry: Choose the relevant industry for your project, such as Professional Services.
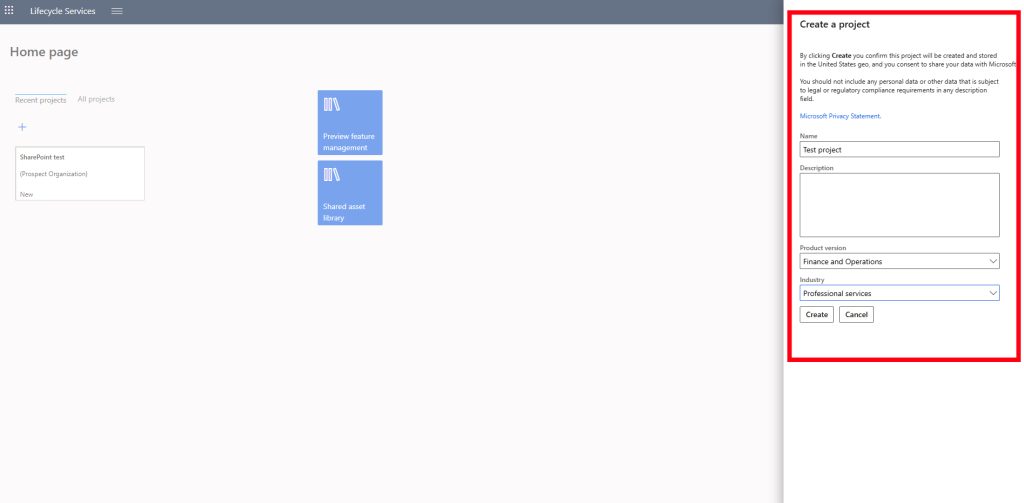
3.Click the Create button to finalize the project creation.
Selecting a Product : Step 3
- If you haven’t selected the product version during project creation, you can do so in the Select a Product section. Options may include:
- Microsoft Dynamics AX 2012
- Finance and Operations
- Dynamics 365 Commerce
- Dynamics 365 Customer Engagement (CRM)
- Microsoft Dynamics NAV
Choose the product that aligns with your project requirements.
Project Overview : Step 4
Once the project is created, it will appear on the Home Page under the Recent Projects or All Projects tabs. You can click on the project to access its workspace, where you can:
- Manage assets.
- Track progress.
- Use the shared asset library for resources.
- Enable preview feature management.
Tips for Managing Lifecycle Services Projects
- Ensure all project details are entered correctly as they directly affect deployment options.
- Use the Shared Asset Library for storing and sharing project assets, such as code and documentation.
- Regularly update the project description to maintain clarity on its scope and goals.
By following these steps, you can quickly create and manage projects in Lifecycle Services, streamlining your Dynamics 365 solution development and deployment process.
Please Follow : Setting Up a Development Environment for Dynamics 365 Finance and Operations (D365 FO)


